Nov 23, 2020
因为有更好的选择!
作为一个前端开发者你是不是经常使用console.log()来测试你的代码?这当然没有错,但是你也许不知道在console这个对象中还有很多令人惊奇的方法可以使用。这篇文章中我会介绍下如何有效使用这些非常棒的方法。
为什么使用console对象?
这个console对象是JavaScript提供对浏览器调试控制台进行访问,你可以在调试控制台上打印一些信息,比如你的代码变量值。这个经常作为开发者调试代码的一种手段。我觉得大部分开发者只会使用console.log()这个方法来打印对象,但是它还有好几个别的有用的方法。
1. console.log()
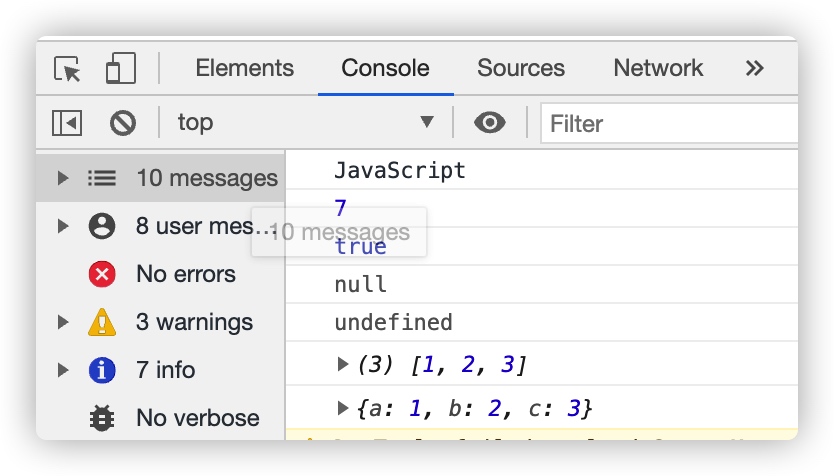
这个方法用来打印数据到调试控制台上,它可以传入任何类型的数据,比如 string,array,object,boolean等等。
样例:
console.log('JavaScript');
console.log(7);
console.log(true);
console.log(null);
console.log(undefined);
console.log([1, 2, 3]);
console.log({a: 1, b: 2, c: 3});
Read more »
Jul 19, 2019
先大概说说Stream的概念,这个Stream就是类似平常大家用的比较多的RxJava、RxSwift等框架的思路,它是一个异步数据的源,它可以接受任何数据,通过StreamController可以给这个Stream添加数据,如果这个Stream有监听者就会接收到数据。
代码如下:
import 'dart:async' ;
void main ( ) {
// 初始化一个Stream controller
final StreamController ctrl = StreamController ();
// 添加一个监听
ctrl . stream . listen (( data ) => print ( ' $data ' ));
// 往Stream中添加数据
ctrl . sink . add ( '这个是字符串' ); //字符串类型
ctrl . sink . add ( 1234 ); //int 类型
ctrl . sink . add ({ 'name' : '姓名' , 'content' : 'json对象也行' }); //对象类型
ctrl . sink . add ( 123.45 ); //double类型
// StreamController用完后需要释放
ctrl . close ();
}
Read more »
Jun 14, 2019
最近用Flutter做功能的时候,发现了这么一个控件ValueListenableBuilder,它也是一个Widget,从它的名字看应该是监听数据,并且用新的数据生成Widget,它的参数就三个:
const ValueListenableBuilder ( {
@required this . valueListenable ,
@required this . builder ,
this . child ,
})
参数说明
valueListenable 数据监听,官方说明:This interface is implemented by [ValueNotifier] and [Animation],所以它不仅可以是ValueNotifier,还可以是Animation。 builder 根据上面的监听器重新绘制Widget。child 这个child会作为参数传入上面的那个builder方法中,它干啥用呢。可能ValueListenableBuilder生成的Widget中有一些子元素跟上面监听的数据没有关系,不需要重新绘制。
示例
从上面那些说明看来这个控件的作用就是作为局部刷新用的,可能我们整个页面上只是一个小参数变化了,那有了这个Widget就不需要用setState(() {});来刷新整个页面。
做个简单的示例,这个示例是flutter默认生成的项目改写的:
class _MyHomePageState extends State < MyHomePage > {
int _counter = 0 ;
final ValueNotifier < int > _notifier = ValueNotifier < int >( 0 );
void _incrementCounter () {
_counter ++;
_notifier . value ++;
}
@override
Widget build ( BuildContext context ) {
return Scaffold (
appBar: AppBar (
title: Text ( widget . title ),
),
body: Center (
child: Column (
mainAxisAlignment: MainAxisAlignment . center ,
children: < Widget >[
ValueListenableBuilder (
valueListenable: _notifier ,
builder: ( BuildContext context , int value , Widget child ) {
return Text (
'You have pushed the button this many times: $value ' ,
);
}),
Text (
' $_counter ' ,
style: Theme . of ( context ). textTheme . display1 ,
),
],
),
),
floatingActionButton: FloatingActionButton (
onPressed: _incrementCounter ,
tooltip: 'Increment' ,
child: Icon ( Icons . add ),
),
);
}
}
Read more »
Jun 6, 2019
平常桌面上都放着一些草稿纸,因为经常要整理思路、画画草图啥的。这不是电子时代嘛,就觉得在手机、pad上也可以这样写写画画,我看了有很多这种类似的app,功能很简单就一个白板,直接就可以画,工具栏大概包括选画笔颜色、选笔尖大小、选橡皮擦等。
于是我用Flutter简单实现了一个,效果看下图,可以选颜色和笔尖大小:
主要思路
整体看这个功能实现不难,其实就是一个普通画板,画板我们可以用一个CustomPainter来做,关于CustomPainter我前面有文章有介绍过《Flutter 学习6:绘制动画》 。
CustomPainter 根据拖动手势,把手指滑动过的坐标画出来,其实就是把点连成线,并且得知道当时的画笔颜色和大小。
那拖动手势当然用GestureDetector啦,拖动的时候用onPanUpdate事件来获取坐标并且把坐标连成线,每次绘画结束就用拖动结束事件来处理onPanEnd 。
Read more »
May 16, 2019
最近做一个日期选择器,仿照钉钉上的,它有三种模式:日期选择、日期间隔、日期+时间。日期是用一个月历选择的,时间是滚动的TimePicker。
大概的样子是这样的:
日期选择
日期间隔
日期+时间
Read more »
Apr 18, 2019
应用切换主题,或者叫换皮肤,这在现在的应用中还是蛮常见,还有一些比如节日主题的需求也是一样,都需要动态的切换颜色、背景、图片等内容,这种情况其实应用开发开始的时候规划蛮重要的,不然等到应用开发到一定程度再考虑往往工作量就会很大,修改的地方很多。
UIAppearance
开始考虑的时候发现官方有提供一个叫UIAppearance的代理类,说是处理全局统一管理IOS控件的样式的。这个代理方式的思路蛮好的,把官方提供的所有IOS控件都进行处理,可以统一设置各种控件自身的样式。而且代码没有侵入性。
比如:
// 设置主题色
UIApplication . shared . delegate ? . window ?? . tintColor = theme . mainColor
// 设置NavigationBar的样式
UINavigationBar . appearance () . barStyle = . black
// 设置TabBar背景
UITabBar . appearance () . backgroundImage = UIImage ( named : "barBackground" )
...
所以有这个代理类,我们只要定义好主题,然后切换的时候设置一下就都变过来了。
如下定义主题:
enum Theme : Int {
case Red = 0
case Blue = 1
case Green = 2
//主题色
var mainColor : UIColor {
switch self {
case . Red :
return UIColor . red
case . Blue :
return UIColor . blue
case . Green :
return UIColor . green
}
}
...
}
切换主题:
static func applyTheme ( theme : Theme ) {
// 保存当前主题
UserDefaults . standard . set ( theme . rawValue , forKey : SelectedThemeKey )
UserDefaults . standard . synchronize ()
// 设置各个组件的主题色
let sharedApplication = UIApplication . shared
sharedApplication . delegate ? . window ?? . tintColor = theme . mainColor
UIApplication . shared . delegate ? . window ?? . tintColor = theme . mainColor
let navBar = UINavigationBar . appearance ()
navBar . barStyle = theme . barStyle
navBar . tintColor = theme . barTextColor
navBar . barTintColor = theme . mainColor
let tabBar = UITabBar . appearance ()
tabBar . barStyle = theme . barStyle
tabBar . barTintColor = theme . tabBarBackgroundColor
UISwitch . appearance () . tintColor = theme . mainColor
}
可以看到直接设置window的tintColor是能马上提现的,但是通过UIAppearance设置的就不行,它只能在view放到window之前设置才有效。比如上面我们设置好了主题,切换TabController内部的UIViewController,设置好的NavigationBar的背景颜色就体现出来了。
UIAppearance它其实有一个大统一的思路,它把所有同一类型的UI都进行了统一管理,但是实际业务比这个复杂的多,所以用它来做切换皮肤的功能难度还是很大的。
SwiftTheme
后来在GitHub上找到了一个国人写的换肤框架,SwiftTheme 。
先看效果:
Read more »
Apr 10, 2019
PageView 在Android中也是很常用的一个控件,可以配合TabBar、BottomBar做页面切换。也有很多广告Banner页用PageView来实现。Flutter也有这个Widget,用法更灵活方便。
PageView ({
Key key ,
this . scrollDirection = Axis . horizontal ,
this . reverse = false ,
PageController controller ,
this . physics ,
this . pageSnapping = true ,
this . onPageChanged ,
...
})
参数说明
scrollDirection 可以控制滚动方向,这个PageView不仅可以横向滚动,还能垂直滚动
reverse 是控制滚动方向,比如横向滚动的时候,一般我们是从右往左滚动,这个参数设置成true就是默认反一反,变成从左往右滚动。
controller 有很多操作可以做,可以控制跳转到某一页,可以控制PageView初始显示页面等
physics 是处理滚动到最前或滚动到最后的时候的动画效果,Flutter默认有提供几个实现好的效果,BouncingScrollPhysics、ClampingScrollPhysics等
pageSnapping 控制滚动方式默认true的情况下,PageView都是一页一页翻的,如果设置成false,真个PageView就可以一点点滚动,就是不用整页滚动过去,滚动到一半的时候也能停下来。
onPageChanged 是一个监听事件,页面切换就调用一次,并传回当前显示页面的序号。
默认构造
这个默认构造,一般用在多个页面切换的场景下,只要放入固定的几个页面就行了。
例子代码:
PageView (
children: < Widget >[
Container (
color: Colors . red ,
child: Center ( child: Text ( '第一页' , style: TextStyle ( color: Colors . white ),),),
),
Container (
color: Colors . blue ,
child: Center ( child: Text ( '第二页' , style: TextStyle ( color: Colors . white ),),),
),
Container (
color: Colors . green ,
child: Center ( child: Text ( '第三页' , style: TextStyle ( color: Colors . white ),),),
),
Container (
color: Colors . blueGrey ,
child: Center ( child: Text ( '第四页' , style: TextStyle ( color: Colors . white ),),),
)
],
)
Read more »
Mar 29, 2019
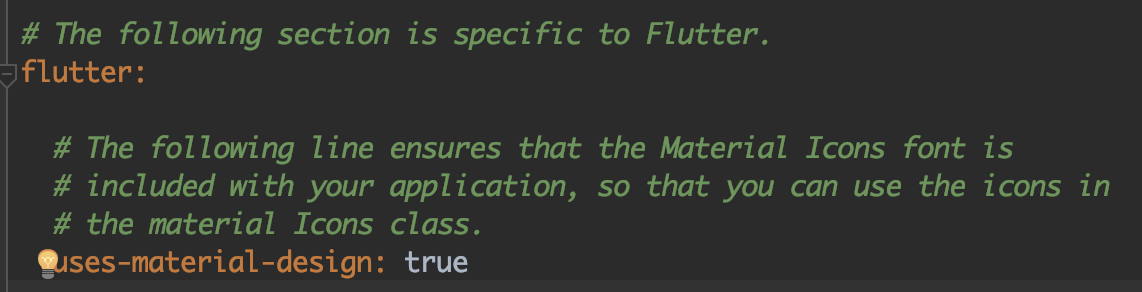
Flutter默认开启了uses-material-design。
但需求无止境嘛,虽然这个material design的Icons库里面已经有很多图标了,有些需求或者场景下想找到一个符合语境的图标还是很难。不过最近发现了一个网站 Flutter Icon ,可以通过上传svg文件生成自定义字体文件,然后就可以使用自定义的Icon了。
Read more »
Mar 27, 2019
Android的指纹识别系统API是从Android M开始支持的。有专门的FingerprintManager类来提供指纹识别的能力,但是最新的Android P开始这个类被废弃了,取而代之的是BiometricPrompt类,从名字上看是生物识别,说明提供了更多的识别的支持,比如人脸识别、虹膜识别?我随便猜的😄
所以你的应用要使用指纹识别来进行验证的话,如果你的工程compileSdkVersion大于等于Android P就需要写两种调用方式,如果低于Android P,但是大于等于Android M就只需要写一种调用方式就行了。
FingerprintManager
FingerprintManager是从API 23开始的所以使用的时候必须判断系统版本:
if ( Build . VERSION . SDK_INT >= Build . VERSION_CODES . M ) {
val fingerprintManager = context . getSystemService ( FingerprintManager :: class . java )
}
Read more »
Mar 10, 2019
本文代码是基于Swift4.2。
TouchID和FaceID的验证,在IOS中调用本身比较简单。因为现在要么是FaceID,要么是TouchID,再老一点的就是啥都没有。这种机器应该没人用了吧?不过还有是IOS系统版本的支持。TouchID是从IOS8.0开始的,FaceID是从IOS11.0开始的。
引入模块,初始化环境
要使用验证模块先要引入:
import LocalAuthentication
然后初始化对象:
let context = LAContext . init ()
Read more »

 这使得我们在开发中可以轻松使用很多定义好的图标,非常方便,也节约了很多设计或者找图的时间。