
日程周视图和日视图自定义View
最近项目中要做一个日程管理的模块,其实这东西每个手机系统都有,就是系统的日历应用,做到产品中是为了产品中使用,并能把产品内的数据进行管理展现,方便用户管理生活和工作日程。
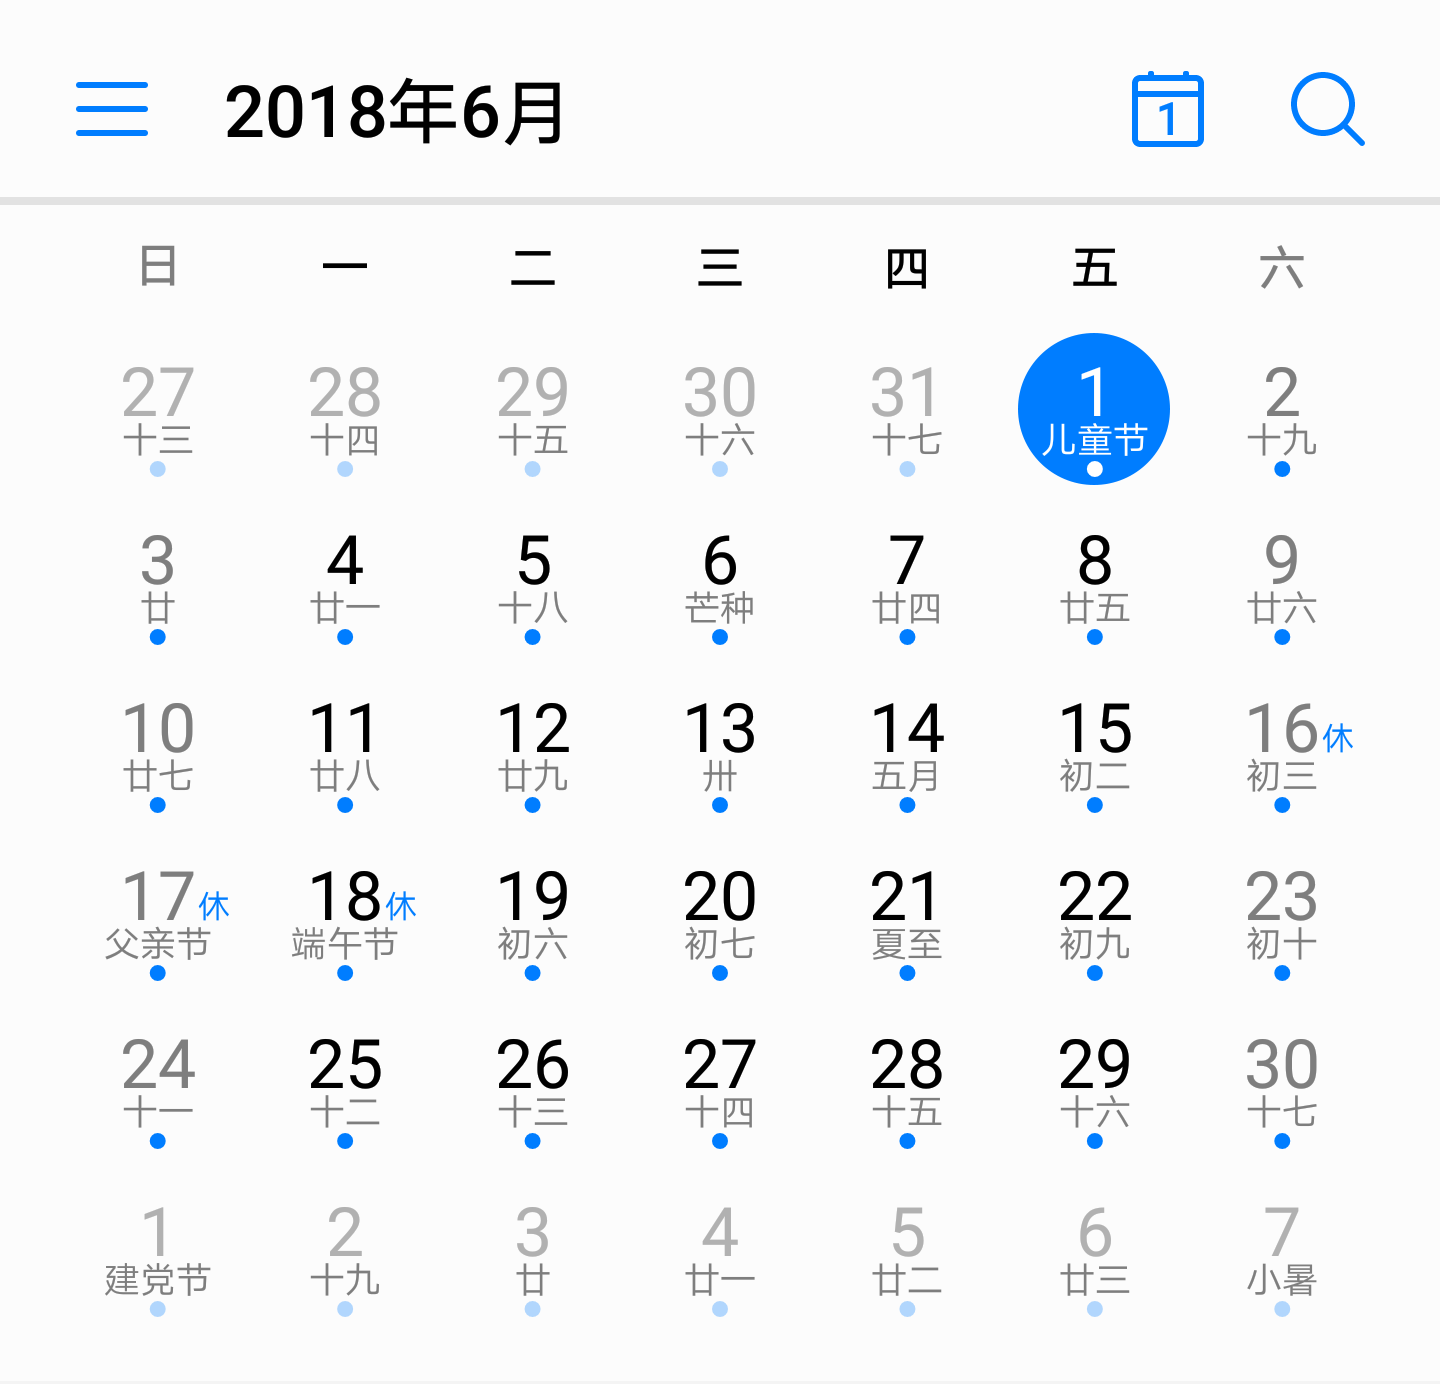
日程管理最基本的界面会有三种视图,月视图、周视图、日视图,大概就下面这样的:
| 月视图 | 周视图 | 日视图 |
|---|---|---|
 |
 |
 |
月视图
月视图应用内本来就有日历控件了,不想重复造轮子,就直接用了。周视图和日视图其实基本差不多,所以就想打造一个自定义控件来实现这两个视图的功能。
周视图、日视图控件
考虑到这个控件都有左右切换翻页的功能,首先想到的是ViewPager ,内部是自定义一个View,把日历和日程内容画上去,左右切换通过ViewPager进行,根据ViewPager的position,来计算内部View应该展现的日历情况。比如周视图,position=0显示本周。日视图,position=0显示今天。
但是ViewPager有个问题position不能小于0,到了0的时候不能继续往左滑动了。没办法,只能参考那些广告Banner类似的思路,给它一个比较大的总量,比如1000,然后一开始给ViewPager设置到position=500的位置:
viewpager.setCurrentItem(500, false)
总不会真的有人闲的蛋疼一直翻,翻500页吧,就算翻到了也只是不能继续翻了,至少不会出错!
这样的话position=500的时候代表的是今天。
画出内部View
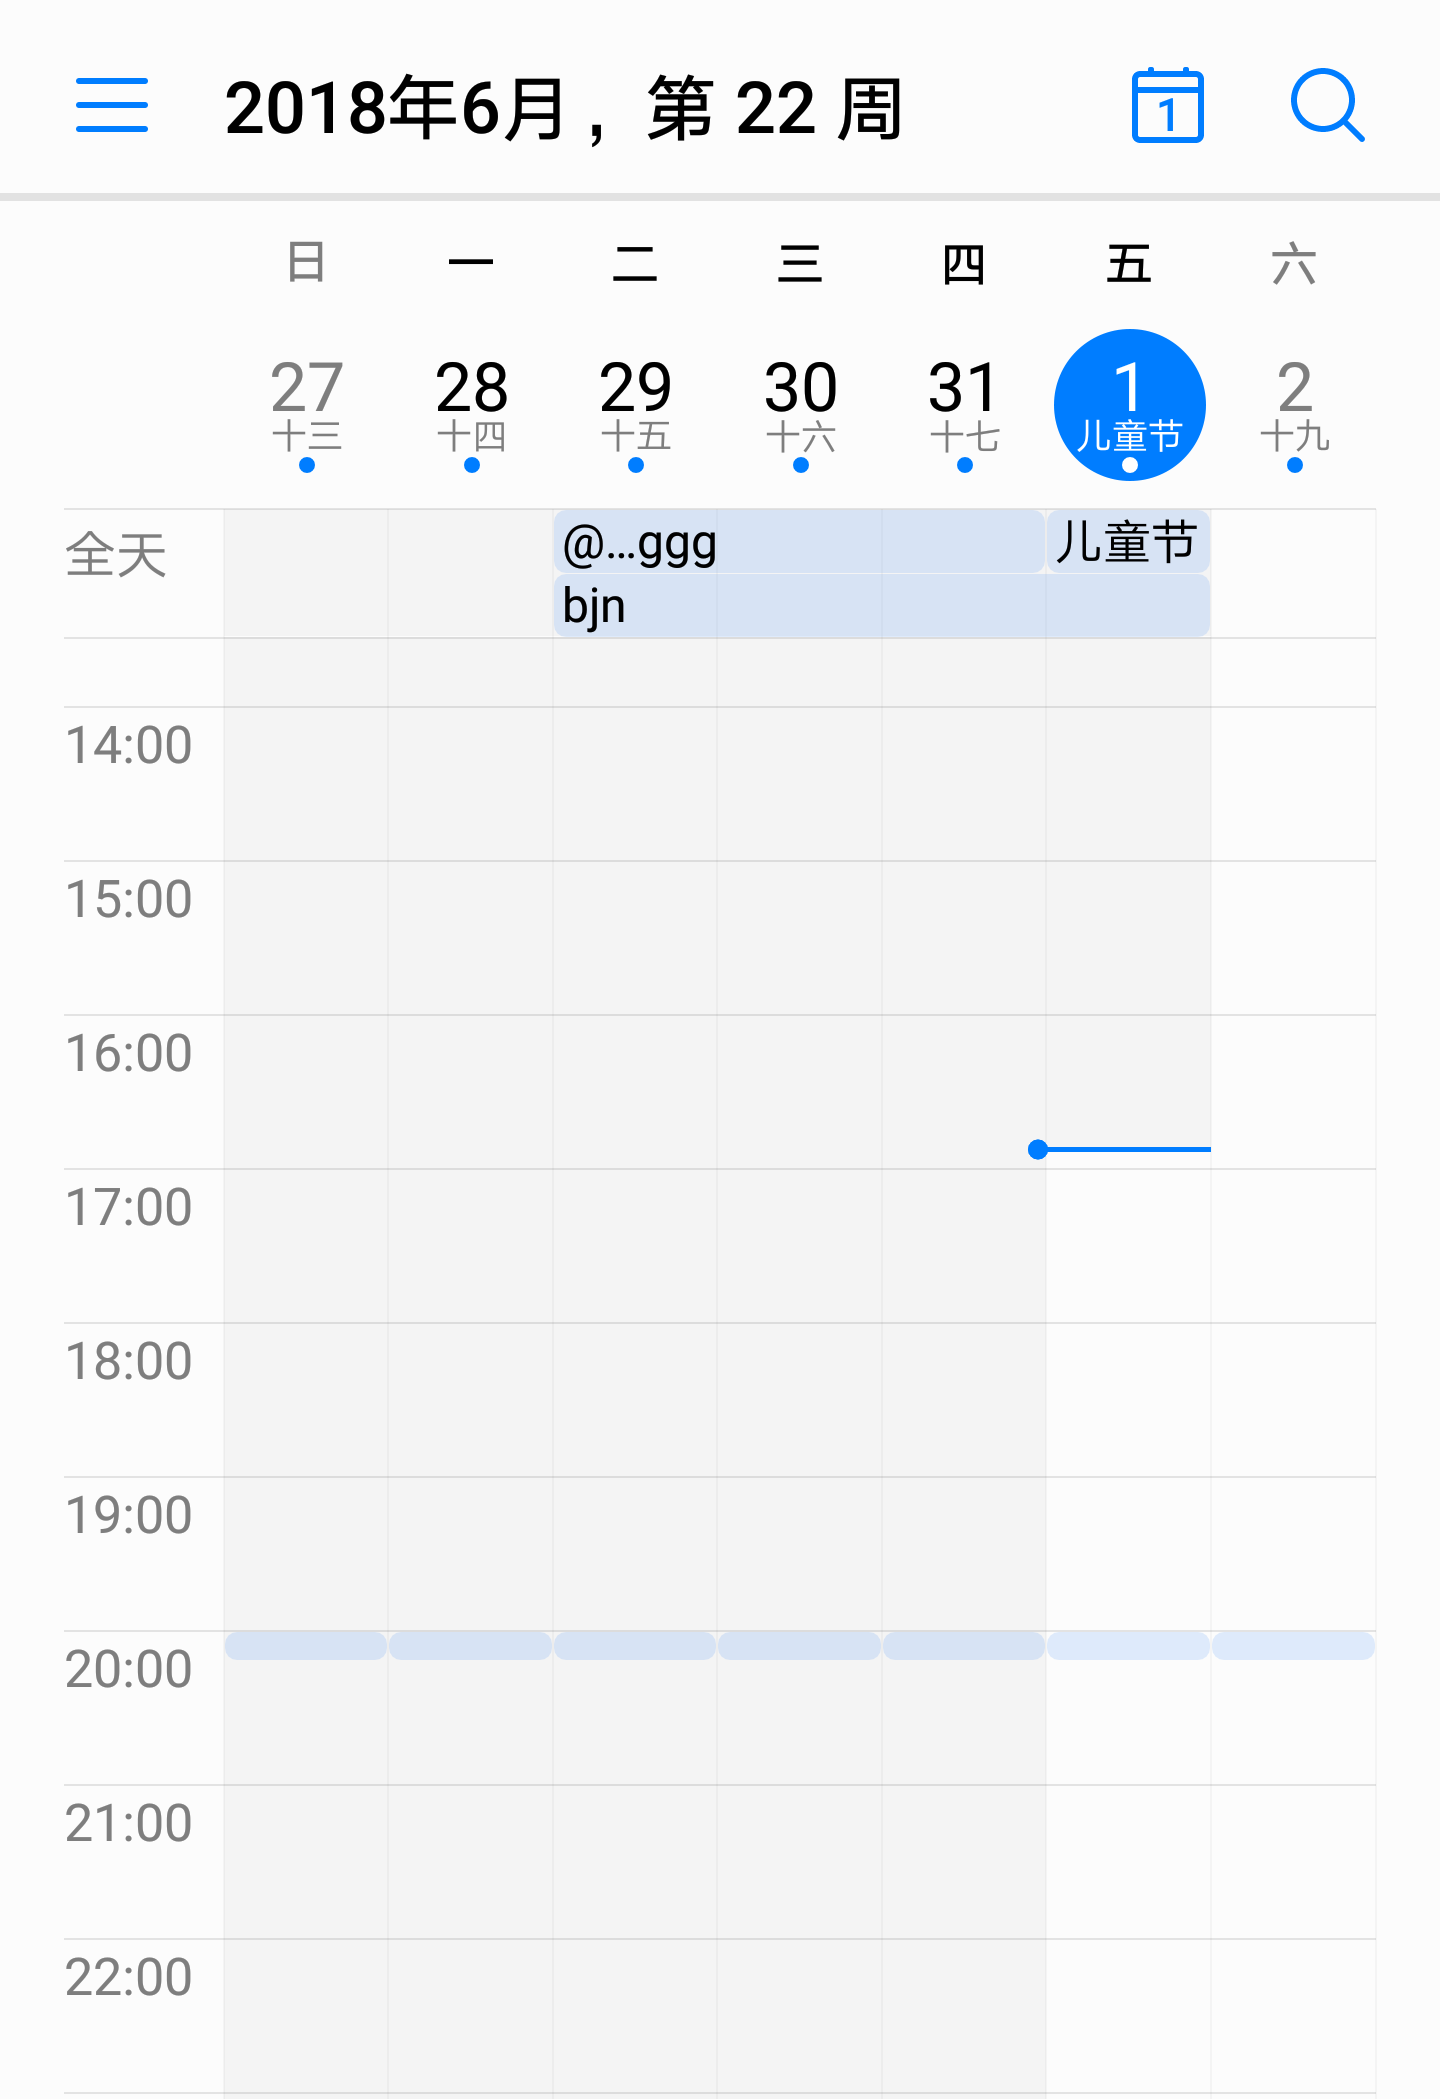
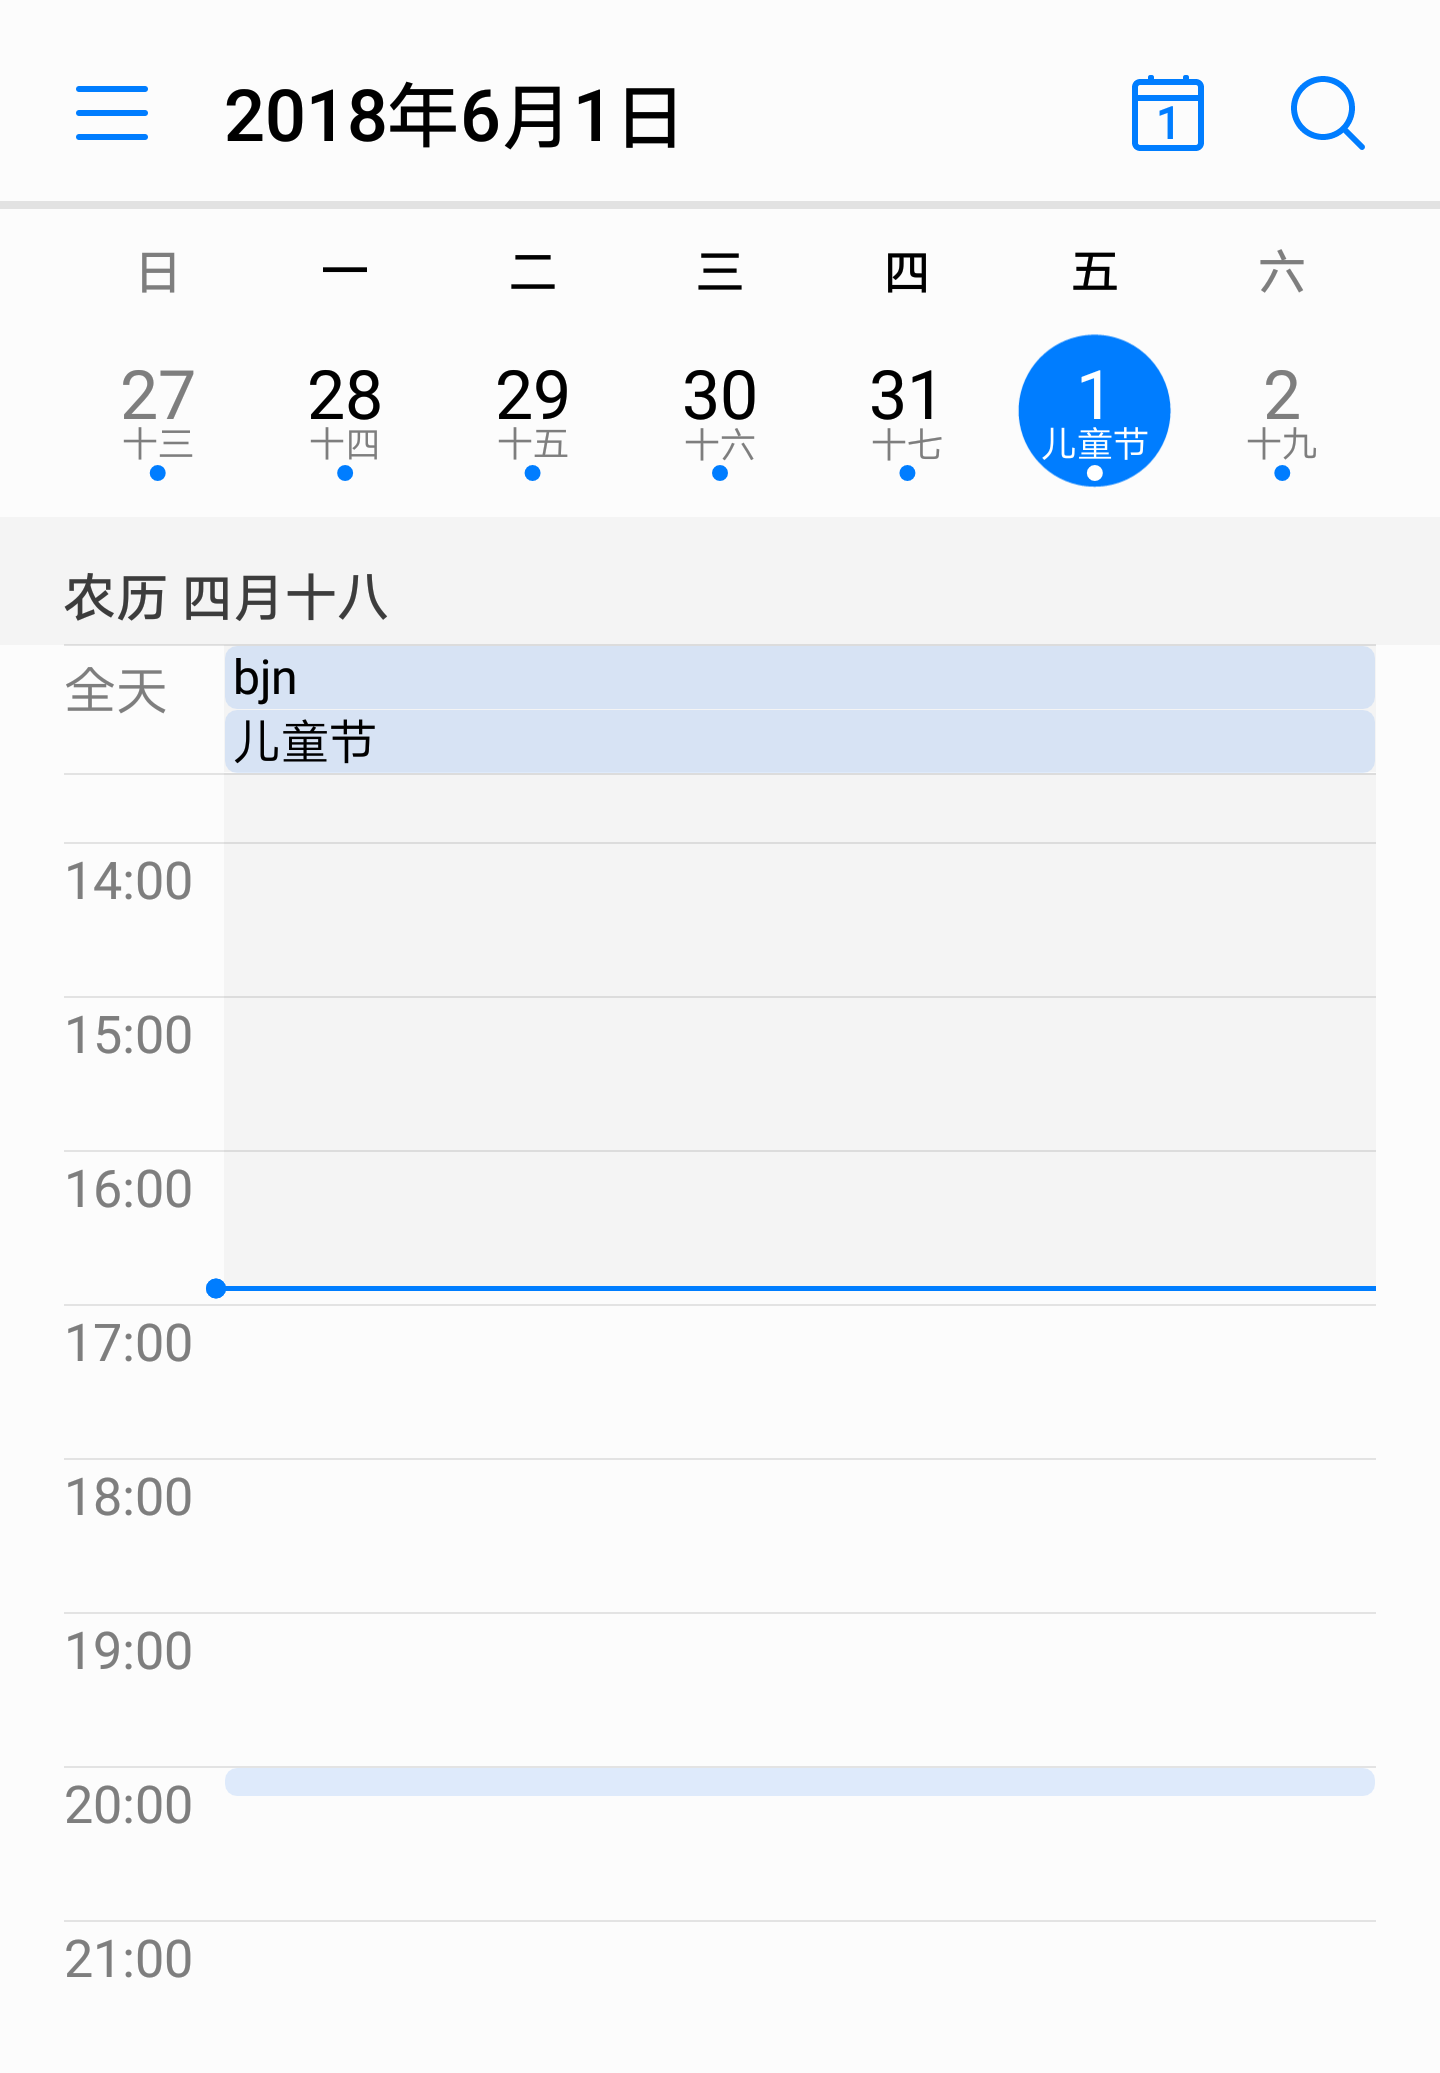
先看看画出来的结果:
| 周视图 | 日视图 |
|---|---|
 |
 |
根据上图的布局,分三块内容进行,分别是头部的日历行、左边小时列、中间内容块
画出左边小时列
 canvas?.drawRect(0f, mHeaderHeight + mHeaderRowPadding * 2, mHeaderColumnWidth, height.toFloat(), mHeaderColumnBackgroundPaint)
 canvas?.clipRect(0f, mHeaderHeight + mHeaderRowPadding * 2, mHeaderColumnWidth, height.toFloat(), Region.Op.REPLACE)
        for (i in 0..23) {
            val top = mHeaderHeight + (mHeaderRowPadding * 2).toFloat() + mCurrentOrigin.y + (mHourHeight * i).toFloat() + mHeaderMarginBottom
			val time = if (i < 10) "0$i:00" else "$i:00"
			if (top < height) canvas?.drawText(time, mTimeTextWidth + mHeaderColumnPadding * 2, top + mTimeTextHeight, mTimeTextPaint)
        }
先是画了左边列的背景色,然后是按小时一块、一块的画上去。
参数比较多:
- mHeaderHeight:头部高度,就是日历行的高度,这个高度还包含了全天事件那块内容的高度。
- mHeaderColumnWidth:这个就是左边小时列的宽度,这个宽度根据时间比如13:00这个文字的宽度计算出来的,再加上左边的空白padding。
- mTimeTextWidth:小时文字的宽度。
- mCurrentOrigin:是一个位置点记录对象PointF,因为24小时一屏高度一般都不够,就会需要上下滑动,这就需要记录当前滑动的高度。
画出中间内容块
mShowDayList.forEach { date ->
            val isToday = isToday(date)
            val start = startPixel
            val startY = mHeaderHeight + (mHeaderRowPadding * 2).toFloat() + mTimeTextHeight / 2 + mHeaderMarginBottom + mCurrentOrigin.y
            //计算时间段 是过去时间还是未来时间
            when{
                isToday->{
                    val now = Calendar.getInstance()
                    val beforeNow = (now.get(Calendar.HOUR_OF_DAY) + now.get(Calendar.MINUTE) / 60.0f) * mHourHeight
                    canvas?.drawRect(start, startY, startPixel + mWidthPerDay, startY + beforeNow, mPastBackgroundPaint)
                    canvas?.drawRect(start, startY + beforeNow, startPixel + mWidthPerDay, height.toFloat(), mFutureBackgroundPaint)
                }
                (date.before(Date()))->{
                    canvas?.drawRect(start, startY, startPixel + mWidthPerDay, height.toFloat(), mPastBackgroundPaint)
                }
                else->{
                    canvas?.drawRect(start, startY, startPixel + mWidthPerDay, height.toFloat(), mFutureBackgroundPaint)
                }
            }
            var i = 0
            for (hourNumber in 0..23) {
                val top = mHeaderHeight + (mHeaderRowPadding * 2).toFloat() + mCurrentOrigin.y + (mHourHeight * hourNumber).toFloat() + mTimeTextHeight / 2 + mHeaderMarginBottom
                if (top > mHeaderHeight + (mHeaderRowPadding * 2).toFloat() + mTimeTextHeight / 2 + mHeaderMarginBottom - mHourSeparatorHeight
                        && top < height && startPixel + mWidthPerDay - start > 0) {
                    hourLines[i * 4] = start
                    hourLines[i * 4 + 1] = top
                    hourLines[i * 4 + 2] = startPixel + mWidthPerDay
                    hourLines[i * 4 + 3] = top
                    i++
                }
            }
            // 画出小时间隔线
            canvas?.drawLines(hourLines, mHourSeparatorPaint)
            // 画上事件的方块
            drawEvents(date, startPixel, canvas)
            // 画上当前事件线
            if (mShowNowLine && isToday) {
                val now = Calendar.getInstance()
                val beforeNow = (now.get(Calendar.HOUR_OF_DAY) + now.get(Calendar.MINUTE) / 60.0f) * mHourHeight
                canvas?.drawLine(start, startY + beforeNow, startPixel + mWidthPerDay, startY + beforeNow, mNowLinePaint)
            }
            startPixel += mWidthPerDay + mColumnGap
        }
根据视图显示的日期数量一列、一列画出来,周视图画7列,日视图画一列。循环内就是一列。
先是画背景,背景色分已经过去的时间段和未来的时间段。比较特殊的是今天,要根据当前时间算出前后分割的位置,分两块画出整列的背景色。
然后是画上小时间隔线, 事件的方块
最后是画出当前时间线。
整个画的顺序就是从下往上一层层画出来,最需要看到的画上面。
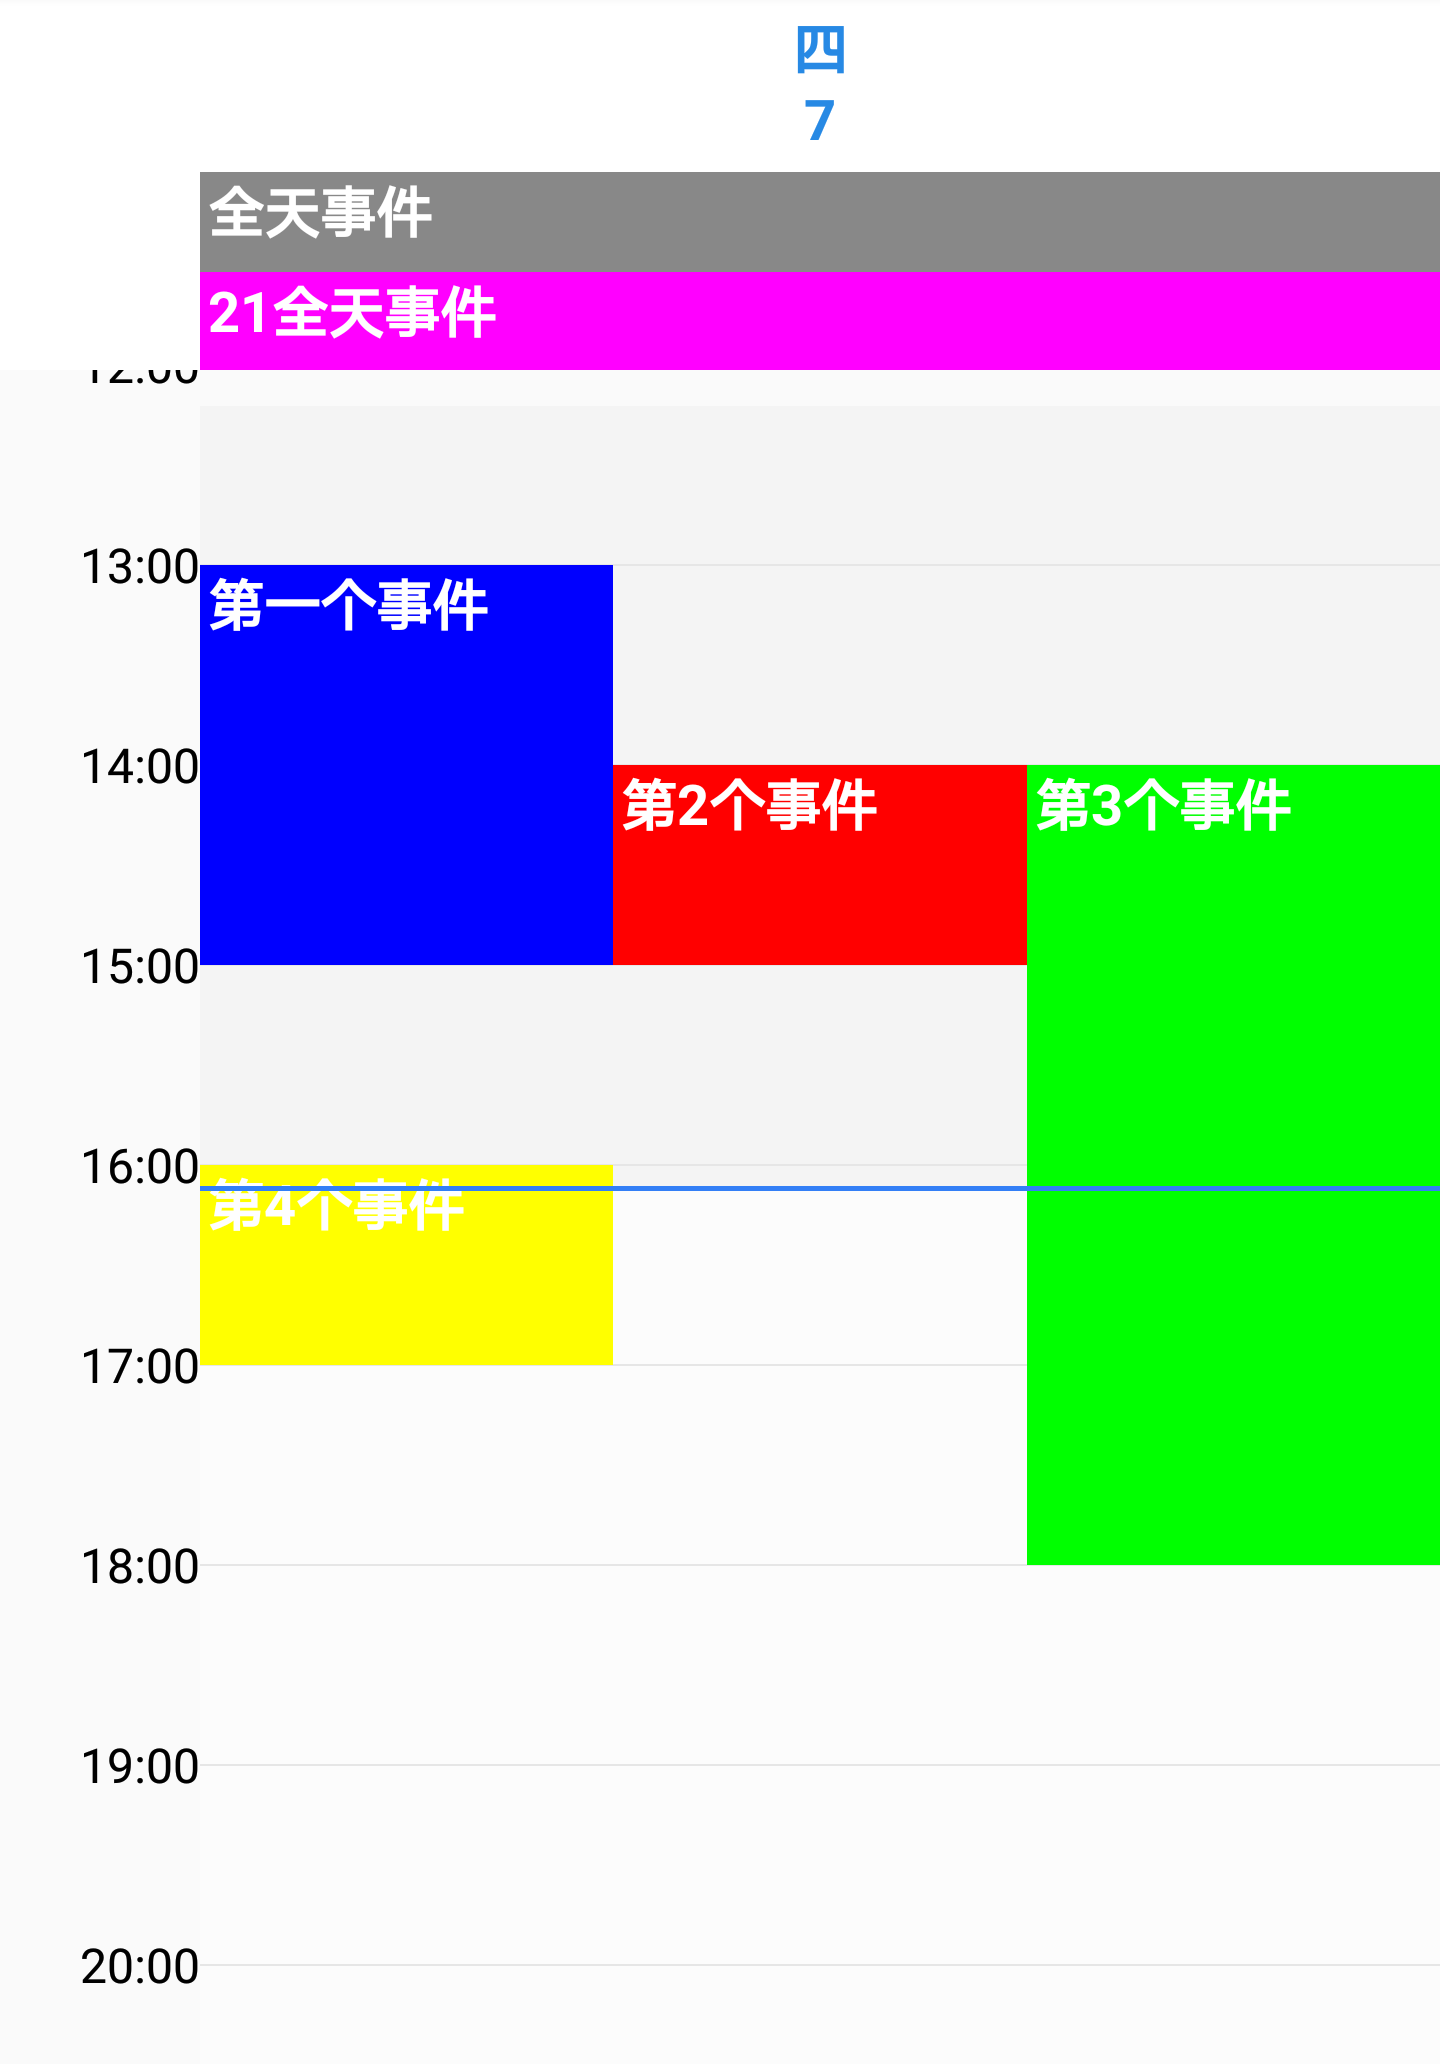
普通事件块
private fun drawEvents(date: Date, startPixel: Float, canvas: Canvas?) {
        val day = Calendar.getInstance()
        day.time = date
        eventList.forEachIndexed { _, eventDrawBO ->
            if (isSameDay(eventDrawBO.event.startTime, day) && !eventDrawBO.event.isAllDay) {
                val top = mHourHeight.toFloat() * 24f * eventDrawBO.top / 1440 +
                        mCurrentOrigin.y + mHeaderHeight + (mHeaderRowPadding * 2).toFloat() +
                        mHeaderMarginBottom + mTimeTextHeight / 2
                val bottom = mHourHeight.toFloat() * 24f * eventDrawBO.bottom / 1440 +
                        mCurrentOrigin.y + mHeaderHeight + (mHeaderRowPadding * 2).toFloat() +
                        mHeaderMarginBottom + mTimeTextHeight / 2
                val left = startPixel + eventDrawBO.left * mWidthPerDay
                val right = left + eventDrawBO.width * mWidthPerDay
                if (left < right &&
                        left < width &&
                        top < height &&
                        right > mHeaderColumnWidth &&
                        bottom > mHeaderHeight + (mHeaderRowPadding * 2).toFloat() + mTimeTextHeight / 2 + mHeaderMarginBottom) {
                    val rectF = RectF(left, top, right, bottom)
                    eventDrawBO.rectF = rectF
                    mEventBackgroundPaint.color = if (eventDrawBO.event.color == 0) mDefaultEventColor else eventDrawBO.event.color
                    canvas?.drawRoundRect(rectF, 0f, 0f, mEventBackgroundPaint)
                    drawEventTitle(eventDrawBO.event, rectF, canvas, top, left)
                }
            }
        }
    }
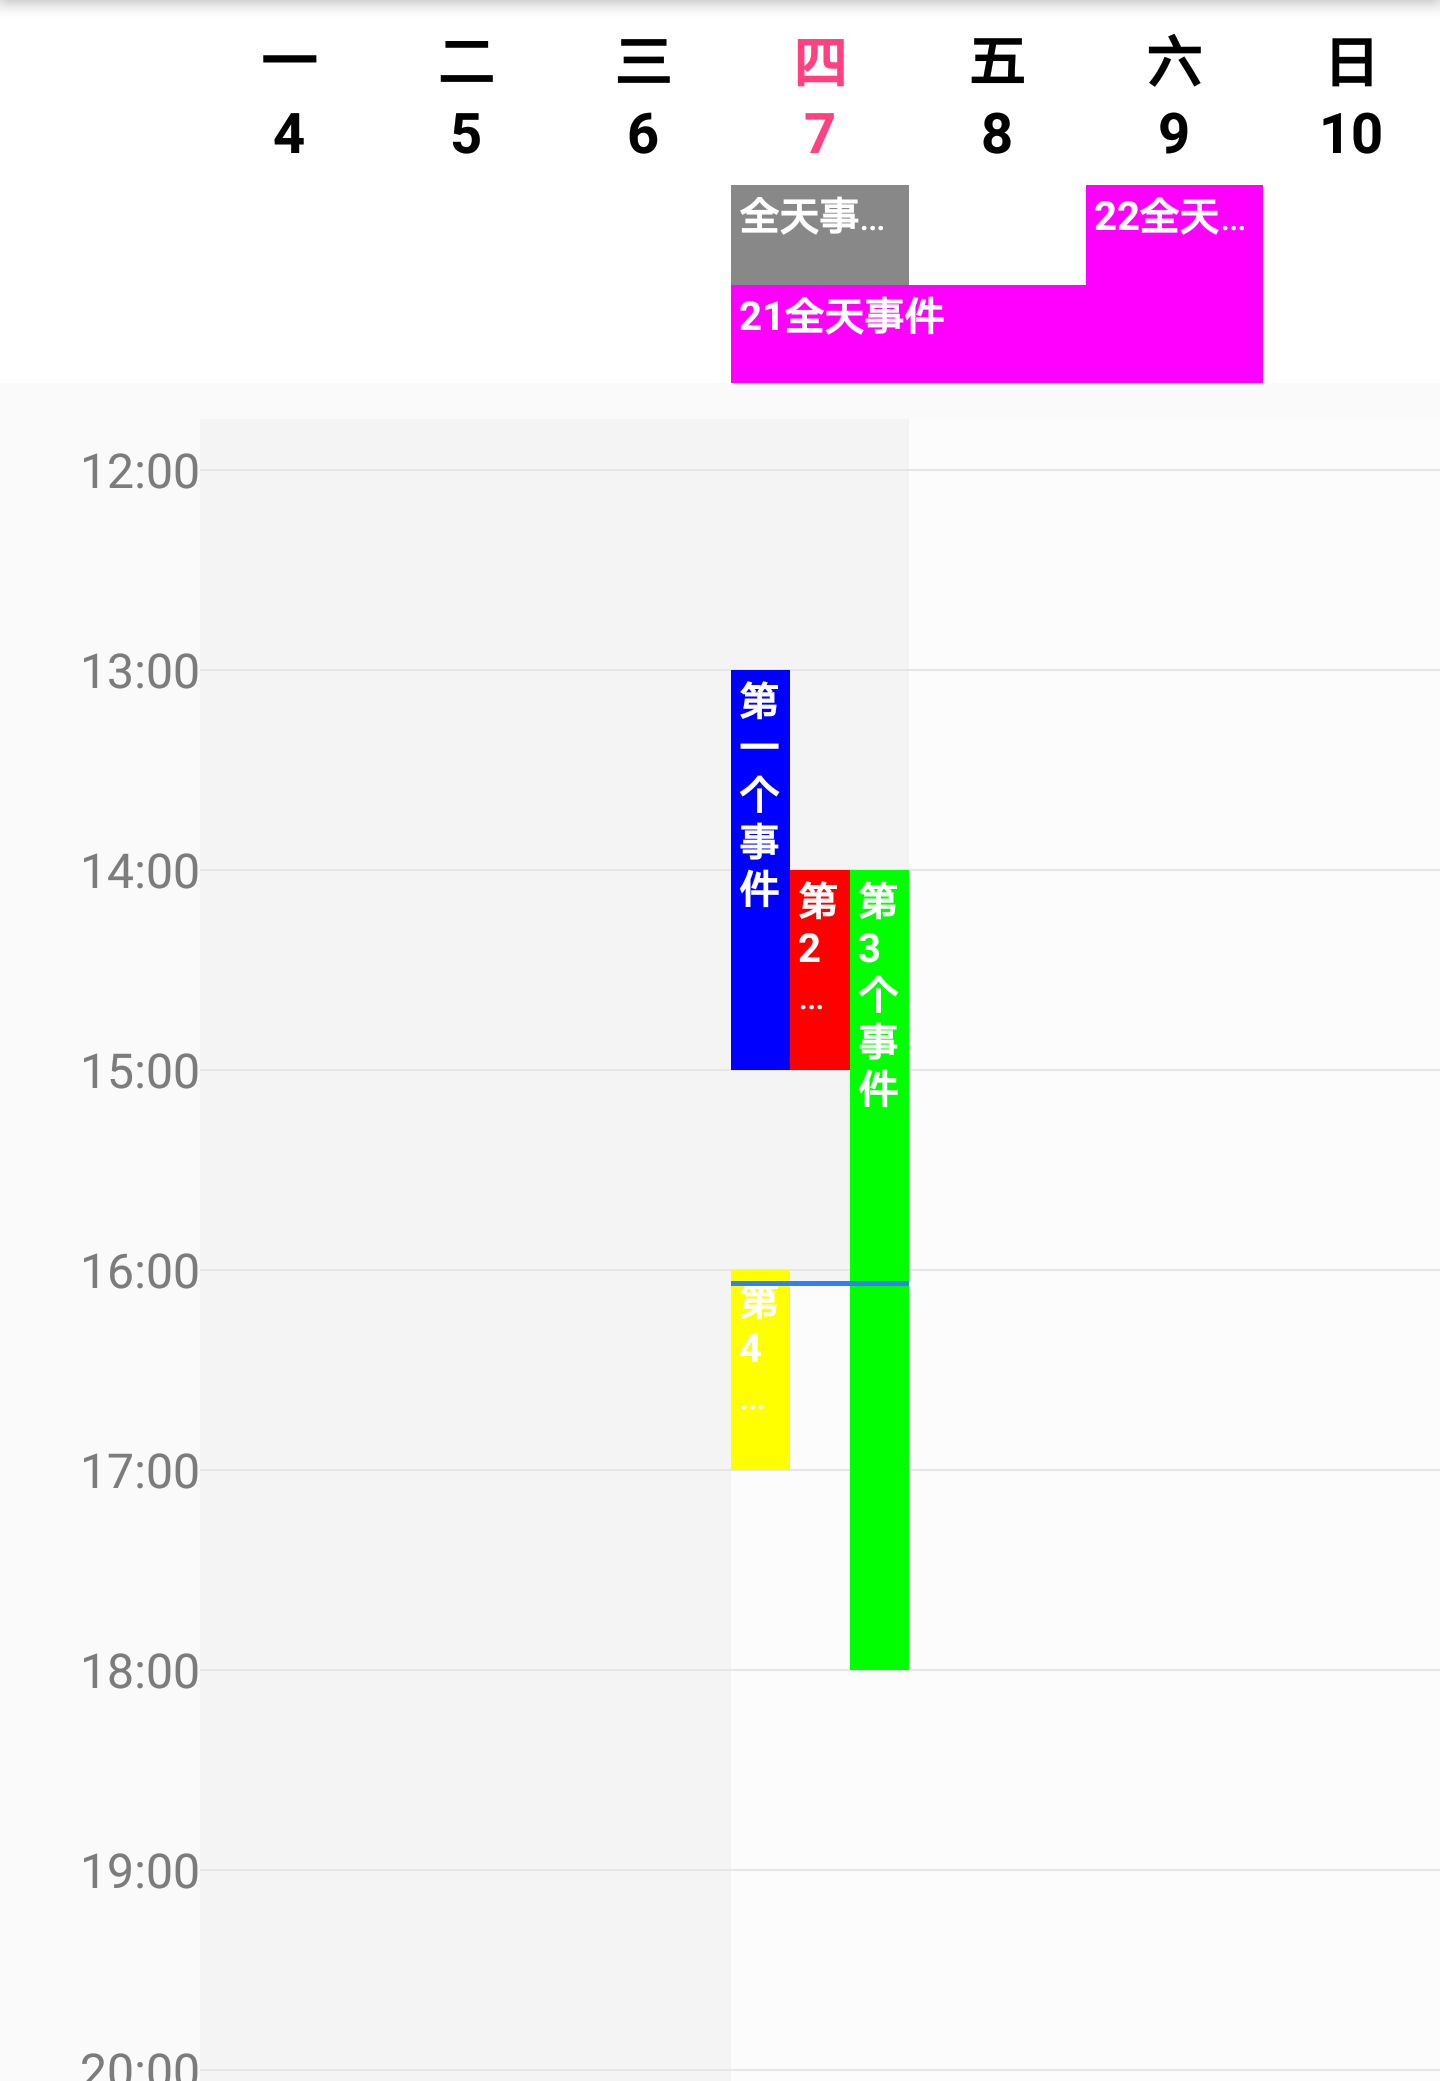
这些普通事件画上去比较简单,就是画几个方块上去,关键是定位,它所在位置的计算,上面代码中eventDrawBO.top、eventDrawBO.bottom、eventDrawBO.left、eventDrawBO.width这些事件的位置参数如何计算。
我的思路是事件数据进来后,根据事件重叠的情况和开始时间进行排序,算出一个尽量每个事件宽度都足够宽,并且不重叠的顺序,然后宽度、高度按照百分比保存在eventDrawBO.top、eventDrawBO.bottom、eventDrawBO.left、eventDrawBO.width这些参数中。
下面是计算过程,传入的list是一天的事件数据:
private fun calEventWidthEveryday(list: ArrayList<ScheduleViewEvent>) {
        //开始计算事件方块的重叠情况,计算一个最终的方块宽度
        val columns = ArrayList<ArrayList<ScheduleViewEvent>>()
        columns.add(ArrayList())
        for (eventRect in list) {
            var isPlaced = false
            for (column in columns) {
                if (column.isEmpty()) {
                    column.add(eventRect)
                    isPlaced = true
                } else if (!isEventsCollide(eventRect, column[column.size - 1])) {
                    column.add(eventRect)
                    isPlaced = true
                    break
                }
            }
            if (!isPlaced) {
                val newColumn = ArrayList<ScheduleViewEvent>()
                newColumn.add(eventRect)
                columns.add(newColumn)
            }
        }
        var maxRowCount = 0
        for (column in columns) {
            maxRowCount = Math.max(maxRowCount, column.size)
        }
        for (i in 0 until maxRowCount) {
            var j = 0f
            for (column in columns) {
                if (column.size >= i + 1) {
                    val event = column[i]
                    val eventRect = ScheduleViewEventDrawBO(event)
                    if (!eventRect.event.isAllDay) {
                        eventRect.width = 1f / columns.size
                        eventRect.left = j / columns.size
                        eventRect.top = (eventRect.event.startTime.get(Calendar.HOUR_OF_DAY) * 60 + eventRect.event.startTime.get(Calendar.MINUTE)).toFloat()
                        eventRect.bottom = (eventRect.event.endTime.get(Calendar.HOUR_OF_DAY) * 60 + eventRect.event.endTime.get(Calendar.MINUTE)).toFloat()
                    } else {// 全天事件 还有 跨天事件 是在头部 多个事件重叠是纵向排列
                        eventRect.height = 1f / columns.size
                        eventRect.top = j / columns.size
                        val rightIndex = eventRect.event.endTime.get(Calendar.DAY_OF_YEAR) - eventRect.event.startTime.get(Calendar.DAY_OF_YEAR)
                        //left起始  , right是跨度 跨几天
                        eventRect.left = 0f
                        eventRect.right = (rightIndex + 1).toFloat()
                    }
                    eventList.add(eventRect)
                }
                j++
            }
        }
    }
画出头部行
		canvas?.drawRect(0f, 0f, width.toFloat(), mHeaderHeight + mHeaderRowPadding * 2, mHeaderBackgroundPaint)
        mShowDayList.forEach { date ->
            val isToday = isToday(date)
            val weekDayCh = getWeekDay(date)
            val dayString = stringDateTime("d", date)
            canvas?.drawText(weekDayCh, startPixel + mWidthPerDay / 2, mHeaderTextHeight / 2 + mHeaderRowPadding, if (isToday) mTodayHeaderTextPaint else mHeaderTextPaint)
            canvas?.drawText(dayString, startPixel + mWidthPerDay / 2, mHeaderTextHeight + mHeaderRowPadding + mHeaderTextGap, if (isToday) mTodayHeaderTextPaint else mHeaderTextPaint)
            drawAllDayEvents(date, startPixel, canvas)
            startPixel += mWidthPerDay + mColumnGap
        }
头部相比中间的就简单多了,显示画上一层背景色,然后还是一样按照日期,一天一天把文字画上去,如果是今天就把画笔换一下。
然后全天事件的画法跟普通事件类似,只不过全天事件我是一行一行画的,计算的方式上面事件计算中已经有了,下面是画法:
private fun drawAllDayEvents(date: Date, startPixel: Float, canvas: Canvas?) {
        val day = Calendar.getInstance()
        day.time = date
        eventList.forEachIndexed { _, eventDrawBO ->
            if ((isSameDay(eventDrawBO.event.startTime, day) || theAllDayEventCanDraw(day, eventDrawBO.event.startTime, eventDrawBO.event.endTime)) && eventDrawBO.event.isAllDay) {
                val top = mHeaderTextHeight + mHeaderRowPadding * 2 + mHeaderTextGap + eventDrawBO.top * mAllDayEventHeight
                val bottom = top + eventDrawBO.height * mAllDayEventHeight
                var right = startPixel + eventDrawBO.right * mWidthPerDay
                if (right > width) {
                    right = width.toFloat()
                }
                val rectF = RectF(startPixel, top, right, bottom)
                eventDrawBO.rectF = rectF
                mEventBackgroundPaint.color = if (eventDrawBO.event.color == 0) mDefaultEventColor else eventDrawBO.event.color
                canvas?.drawRoundRect(rectF, 0f, 0f, mEventBackgroundPaint)
                drawEventTitle(eventDrawBO.event, rectF, canvas, top, startPixel)
            }
        }
    }
这样整个内容View就画出来了,然后根据传入的视图类型,周视图、日视图决定画的日期数量,就是7天还是1天,其他都一样。
后续还要添加一些自定义参数,到时候再把代码分享到Github上去。