
Pyramid 框架的 Quick Tutorial 学习
Pyramid 是一个小型的web应用框架,按它官方的说法,它既简单又强大,可以很快开发一个小型应用,也可以帮助你写出一个很复杂的应用。并且支持所有python版本。
这些都是废话,网上很多这种web框架的比较,但是听来听去都是各有各好,还是用用看吧,体会过了才知道如何。于是开始看了它的Quick Tutorial,觉得上手确实很快。
准备
要使用Pyramid首先得把它安装到本地来,否则无法运行啊
首先建一个虚拟python环境,省的污染了系统的python环境,方便删除恢复等。
$ export VENV=~/projects/quick_tutorial/env
定义一个变量,地址是放虚拟python环境的目录。
然后将本地的python复制到虚拟环境中:
$ python3 -m venv $VENV
用户虚拟环境更新pip安装目录:
$ $VENV/bin/pip install --upgrade pip setuptools
最后就是安装pyramid:
$VENV/bin/pip install "pyramid==1.9.2" waitress
如何跑起来
建个package文件夹,里面两个文件
setup.py
from setuptools import setup

requires = [
    'pyramid',
    'waitress'
]

setup(name='tutorial',
      install_requires=requires,
)
setup.py写明了依赖的模块,然后用一下命令来加载这些模块:
$ $VENV/bin/pip install -e .
$VENV是python的目录。
然后建个tutorial目录,里面建一个app.py
app.py
from waitress import serve
from pyramid.config import Configurator
from pyramid.response import Response


def hello_world(request):
    print('Incoming request')
    return Response('<body><h1>Hello World!</h1></body>')


if __name__ == '__main__':
    with Configurator() as config:
        config.add_route('hello', '/')
        config.add_view(hello_world, route_name='hello')
        app = config.make_wsgi_app()
    serve(app, host='0.0.0.0', port=6543)
Ok, 就可以启动了。
$ $VENV/bin/python tutorial/app.py
打开浏览器 http://localhost:6543/ 就可以看到Hello World了。
过程很简单,就是用它官方提供的waitress模块启动一个wsgi web应用,浏览器访问的时候,根据配置的路由找到hello_world函数,然后返回响应。
使用配置文件跑起来
首先setup中添加入口entry_points:
from setuptools import setup

requires = [
    'pyramid',
    'waitress',
]

setup(name='tutorial',
      install_requires=requires,
      entry_points="""\
      [paste.app_factory]
      main = tutorial:main
      """,
)
然后增加一个ini配置文件,development.ini
[app:main]
use = egg:tutorial

[server:main]
use = egg:waitress#main
listen = localhost:6543
配置文件表明了应用的入口模块tutorial,以及服务器的参数啥的。
服务器启动的时候找到了tutorial模块,并且配置入口是tutorial:main,那我们需要一个main函数作为入口。
在tutorial目录下新建一个__init__.py:
from pyramid.config import Configurator
from pyramid.response import Response


def hello_world(request):
    return Response('<body><h1>Hello World!</h1></body>')


def main(global_config, **settings):
    config = Configurator(settings=settings)
    config.add_route('hello', '/')
    config.add_view(hello_world, route_name='hello')
    return config.make_wsgi_app()
这样原来的app.py就不需要了。
那现在就需要这样启动了。
$ $VENV/bin/pserve development.ini --reload
模版引擎
Pyramid提供了一个模版插件:pyramid_chameleon,在setup中添加依赖
from setuptools import setup

requires = [
    'pyramid',
    'waitress',
    'pyramid_chameleon',
]

setup(name='tutorial',
      install_requires=requires,
      entry_points="""\
      [paste.app_factory]
      main = tutorial:main
      """,
)
每次模块添加都要这个命令加载一下:
$ $VENV/bin/pip install -e .
还需要在入口函数中把插件加载进来
init.py
from pyramid.config import Configurator

def main(global_config, **settings):
    config = Configurator(settings=settings)
    config.include('pyramid_chameleon')
    config.add_route('home', '/')
    config.add_route('hello', '/howdy')
    config.scan('.views')
    return config.make_wsgi_app()
这里开始没有把view直接写在main函数中而是变成了扫描views,所以需要一个views.py来匹配路由过来的网址。
views.py
from pyramid.view import view_config


# First view, available at http://localhost:6543/
@view_config(route_name='home', renderer='home.pt')
def home(request):
    return {'name': 'Home View'}


# /howdy
@view_config(route_name='hello', renderer='home.pt')
def hello(request):
    return {'name': 'Hello View'}
通过注解来连接路由和view,并且定义了渲染的模版@view_config(route_name='home', renderer='home.pt')
新建一个home.pt模版,内容如下:
<!DOCTYPE html>
<html lang="en">
<head>
    <title>Quick Tutorial: ${name}</title>
</head>
<body>
<h1>Hi ${name}</h1>
</body>
</html>
模版是用$符加大括号来表示参数。
对了,还得在ini配置文件中加载模版插件,development.ini
[app:main]
use = egg:tutorial
pyramid.reload_templates = true

[server:main]
use = egg:waitress#main
listen = localhost:6543
表单生成和验证模块Deform
Pyramid有很多模块插件可以使用,方便开发者。其中就有Deform能启动生成表单和验证表单。
setup中添加模块Deform
from setuptools import setup

requires = [
    'pyramid',
    'waitress',
    'pyramid_chameleon',
    'deform'
]

setup(name='tutorial',
      install_requires=requires,
      entry_points="""\
      [paste.app_factory]
      main = tutorial:main
      """,
)
安装依赖:
$ $VENV/bin/pip install -e .
在启动函数中注册deform的静态文件 __init__.py
from pyramid.config import Configurator


def main(global_config, **settings):
    config = Configurator(settings=settings)
    config.include('pyramid_chameleon')
    config.add_route('wiki_view', '/')
    config.add_route('wikipage_add', '/add')
    config.add_route('wikipage_view', '/{uid}')
    config.add_route('wikipage_edit', '/{uid}/edit')
    config.add_static_view('deform_static', 'deform:static/')
    config.scan('.views')
views.py
import colander
import deform.widget

from pyramid.httpexceptions import HTTPFound
from pyramid.view import view_config

pages = {
    '100': dict(uid='100', title='Page 100', body='<em>100</em>'),
    '101': dict(uid='101', title='Page 101', body='<em>101</em>'),
    '102': dict(uid='102', title='Page 102', body='<em>102</em>')
}

class WikiPage(colander.MappingSchema):
    title = colander.SchemaNode(colander.String())
    body = colander.SchemaNode(
        colander.String(),
        widget=deform.widget.RichTextWidget()
    )


class WikiViews(object):
    def __init__(self, request):
        self.request = request

    @property
    def wiki_form(self):
        schema = WikiPage()
        return deform.Form(schema, buttons=('submit',))

    @property
    def reqts(self):
        return self.wiki_form.get_widget_resources()

    @view_config(route_name='wiki_view', renderer='wiki_view.pt')
    def wiki_view(self):
        return dict(pages=pages.values())

    @view_config(route_name='wikipage_add',
                 renderer='wikipage_addedit.pt')
    def wikipage_add(self):
        form = self.wiki_form.render()

        if 'submit' in self.request.params:
            controls = self.request.POST.items()
            try:
                appstruct = self.wiki_form.validate(controls)
            except deform.ValidationFailure as e:
                # Form is NOT valid
                return dict(form=e.render())

            # Form is valid, make a new identifier and add to list
            last_uid = int(sorted(pages.keys())[-1])
            new_uid = str(last_uid + 1)
            pages[new_uid] = dict(
                uid=new_uid, title=appstruct['title'],
                body=appstruct['body']
            )

            # Now visit new page
            url = self.request.route_url('wikipage_view', uid=new_uid)
            return HTTPFound(url)

        return dict(form=form)

    @view_config(route_name='wikipage_view', renderer='wikipage_view.pt')
    def wikipage_view(self):
        uid = self.request.matchdict['uid']
        page = pages[uid]
        return dict(page=page)

    @view_config(route_name='wikipage_edit',
                 renderer='wikipage_addedit.pt')
    def wikipage_edit(self):
        uid = self.request.matchdict['uid']
        page = pages[uid]

        wiki_form = self.wiki_form

        if 'submit' in self.request.params:
            controls = self.request.POST.items()
            try:
                appstruct = wiki_form.validate(controls)
            except deform.ValidationFailure as e:
                return dict(page=page, form=e.render())

            # Change the content and redirect to the view
            page['title'] = appstruct['title']
            page['body'] = appstruct['body']

            url = self.request.route_url('wikipage_view',
                                         uid=page['uid'])
            return HTTPFound(url)

        form = wiki_form.render(page)

        return dict(page=page, form=form)
还有几个模版文件:
wiki_view.pt
<!DOCTYPE html>
<html lang="en">
<head>
    <title>Wiki: View</title>
</head>
<body>
<h1>Wiki</h1>

<a href="${request.route_url('wikipage_add')}">Add
    WikiPage</a>
<ul>
    <li tal:repeat="page pages">
        <a href="${request.route_url('wikipage_view', uid=page.uid)}">
                ${page.title}
        </a>
    </li>
</ul>
</body>
</html>
wikipage_addedit.pt
<!DOCTYPE html>
<html lang="en">
<head>
    <title>WikiPage: Add/Edit</title>
    <link rel="stylesheet"
          href="${request.static_url('deform:static/css/bootstrap.min.css')}"
          type="text/css" media="screen" charset="utf-8"/>
    <link rel="stylesheet"
          href="${request.static_url('deform:static/css/form.css')}"
          type="text/css"/>
    <tal:block tal:repeat="reqt view.reqts['css']">
        <link rel="stylesheet" type="text/css"
              href="${request.static_url(reqt)}"/>
    </tal:block>
    <script src="${request.static_url('deform:static/scripts/jquery-2.0.3.min.js')}"
            type="text/javascript"></script>
    <script src="${request.static_url('deform:static/scripts/bootstrap.min.js')}"
            type="text/javascript"></script>

    <tal:block tal:repeat="reqt view.reqts['js']">
        <script src="${request.static_url(reqt)}"
                type="text/javascript"></script>
    </tal:block>
</head>
<body>
<h1>Wiki</h1>

<p>${structure: form}</p>
<script type="text/javascript">
    deform.load()
</script>
</body>
</html>
wikipage_view.pt
<!DOCTYPE html>
<html lang="en">
<head>
    <title>WikiPage: View</title>
</head>
<body>
<a href="${request.route_url('wiki_view')}">
    Up
</a> |
<a href="${request.route_url('wikipage_edit', uid=page.uid)}">
    Edit
</a>

<h1>${page.title}</h1>
<p>${structure: page.body}</p>
</body>
</html>
启动起来是这样的:
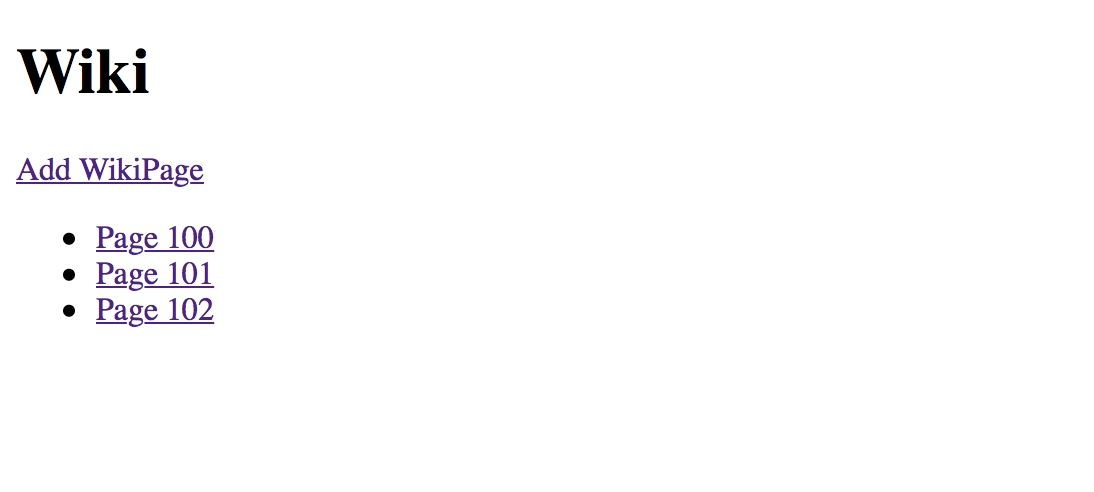
wiki_view:
Wiki_addedit:

WikiPage_view:

在views中,已经把函数都封装到了一个class里面。
首先是首页:wiki_view,wiki_view给模版文件传了一个pages的数组。在模版中使用tal:repeat="page pages"标签进行循环遍历pages数组,展现了数组列表。
其次是在wiki_view页面点击Add WikiPage超链接,进入到了wiki_addedit页面,从views中开始看,这个页面传入了一个form对象,这个form对象是一个WikiPage对象,然后模版页面中很简单的一句:
<p>${structure: form}</p>
<script type="text/javascript">
    deform.load()
</script>
这样就生成了一个上图中的表单页面,相当简单吧,仔细看看WikiPage对象定义2个属性,title和body,并且定义属性的类型,还有一个body还定义了一个widget是一个富文本编辑框,所以在页面上面展现的时候,表单中title和body分别是input输入框和一个富文本编辑框。
最后一个wikipage_view也很简单就是从pages数组中找到对应的那个Page对象展现出来。